Receive mode

Enable receive mode to allow other clients to send you DICOM files. The DICOM viewer now acts as a DICOM server, able to receive
incoming DICOM data while listening on the port number specified in the settings.
See DICOM communication settings, viewer receiving port.
Make sure that your firewalls allow incoming connections over this port and choose a port number not being
used by other software on your PC nor used by other DICOM servers as set in the 'DICOM servers' window.
Receive mode can be started automatically at startup of the DICOM viewer and can be set to allow only TLS secure encrypted communication. See the DICOM Communications settings.
Note that the receive mode is quite different from the query and retrieve tools. Make sure that
the port used for receive mode, is different from any port used by PACS or DICOM servers. If not, you could disturb or even
interrupt the query/retrieve process. For example choose port 5555 or 8888 to receive data and communicate this port number to the persons
sending you DICOM data. See Viewer receiving port (SCP server) to set the port number.
Press the 'RECEIVE MODE' button in the overview window to start listening for incoming connections. Hold the mouse pointer
over the button to view the port number it is listening on. The receive mode is active if the button is pressed down and
the globe is turning. Receive mode will fail if the port number is already in use by a different application.
The pulldown button is used to view the last received subfolders in which the files are stored. Also the retrieved subfolders,
obtained via query and retrieve, are listed here.
The number of files contained by the folder is indicated and a received folder indicates the source too.
Folders with DICOM data obtained via query and retrieve, show only the folder and number of files, no source data
Any folder not been viewed by the user yet is colored red and when new files are received, a red exclamation mark will
flash in the pulldown button to alert the user. Open the pulldown list and click on the folder to view the DICOM files.
A separate settings is available, to always view the received subfolders in the slower scanning mode. This could be handy to quickly view and load the overview with icons and thus skip the fast scan interface.
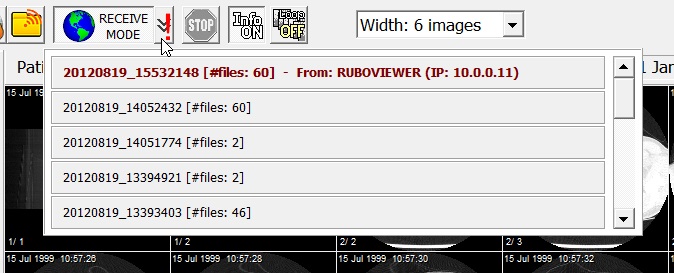
Receive mode active and new files received. The first folder is not yet viewed (red color) and the source
data ('From: RUBOVIEWER...') tells that this data is received using the receive mode. The other folders
are retrieved via query and retrieve (no source data)
The subfolders are stored in the 'Incoming DICOM files storage folder' as set in the
DICOM communication settings. Choose a disk and folder with enough space available as the user has no control over how many
and how large the received DICOM files are. DO NOT CHOOSE A NETWORK DRIVE, choose a local or USB harddisk only!
Right-click any folder to delete it or to delete all received and retrieved DICOM files. These folders are deleted automatically
as set in the DICOM communication settings. This feature can be enabled / disabled in the DICOM Communications settings, Delete incoming DICOM files, Allow manual deletions.
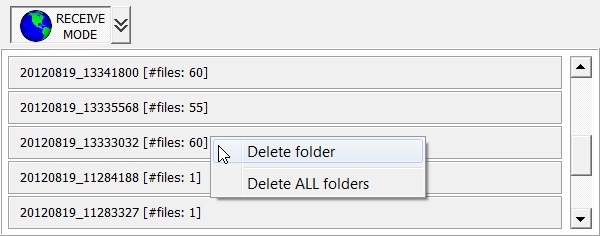
Receive mode active, folders pulled down. Delete a folder by right-clicking it.
The Rubo DICOM viewer has no security settings. It will accept any DICOM client sending any DICOM data.