Measure tool/distance measurement

Measure distances within the image. The measure tool will display distance in millimetres when a pixel size can be determined from the data in the DICOM header. If no data is present in the header or multiple pixel sizes
values are present, you have to use the calibrate tool to convert image pixels to millimetres.
Before you start measureing, zoom the image and maximize the window to be able to measure more accurately. Start a measurement by positioning the mouse pointer at the beginning of the object to measure, then single click.
Now drag the mouse pointer to the end of the object and single-click again. Before you finalize the measurement by a second click, press 'Escape' to cancel your current measurement.
Highlight a measurement. Measurements can be modified by moving the mouse pointer over either end of the measurement line. It
will change the line of the measurement from solid to dotted and a square will be displayed around the end point.
Click and drag this square to change the position of this point.
Delete a measurement by highlighting it followed by a double click within the displayed square. You can only do this when
the distance measurement tool is active, i.e. assigned to a mouse button!
All measurements can be deleted at once by pressing the 'Delete all measurements' button in the toolbar.
This will delete all angle and area measurements as well. Delete just the distance measurements via the menu, go to 'Tools' and 'Delete measurements'.
Start a new measurement from either end of an already existing one, move the mouse pointer over the end of the existing measurement.
This measurement will be highlighted, enabling you to drag/modify but disabling you to start a new measurement. Now press the 'Escape' button on the keyboard to remove the focus from the existing measurement and enable you to start a new distance measurement from this position.
With a multiframes or scenes, the measurement is displayed on all images or on the selected image only. This depends on the measurement tool settings.
If you have set 'Display new measurement.. ..on the displayed image only', it obviously will be displayed for this image only. It can be made to display on all images by highlighting it and pressing the 'c' key on your keyboard. Undo this by pressing 'c' again.
The other setting, 'Display new measurement.. ..on all images of a run', speaks for itself. However, to take a measurement for the displayed image only, start the measurement while holding down the CTRL key on your keyboard.
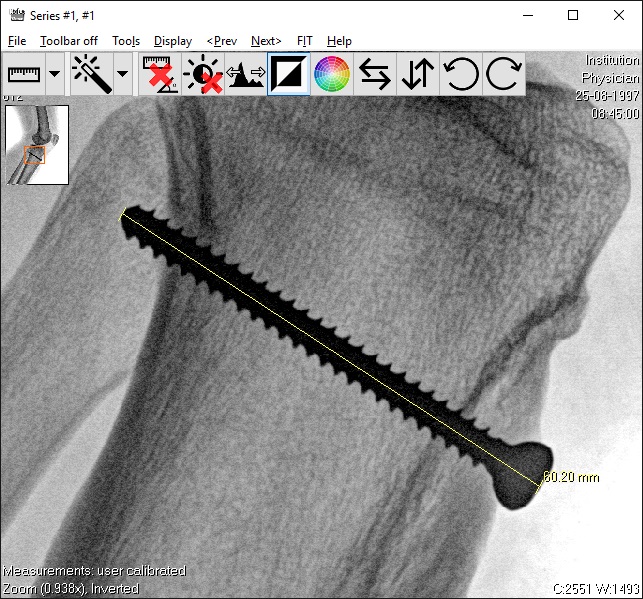
Length of screw showing 60.20 millimetres, measure tool assigned to left mouse button,
the enhancement tool to the right mouse button. The image is inverted
The measurement tool support ultrasound regions. Various regions of an ultrasound image may represent different physical parameters such as blood velocity, time, volume, spatial distance, etc.
See the image below, holding 3 different measurements: a pixel measurement, a millimetre measurement and a measurement split into a time- and speed-measurement.
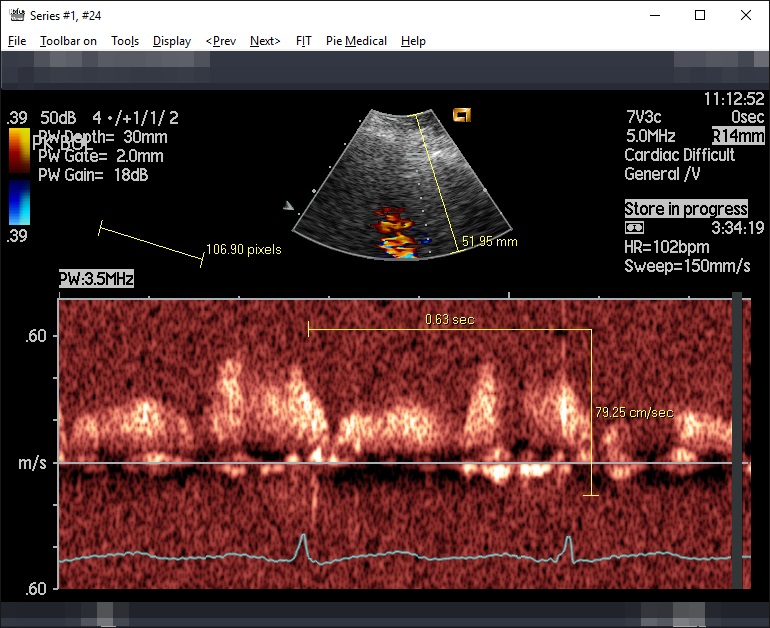
Ultrasound region measurements with different units: pixels, millimetres, seconds and centimetres per second