Copy or store DICOM files

Select image data, shown in the overview window, to save it anywhere on your PC, USB stick, network storage, etc. Click on the 'Store DICOM files' button in the toolbar of the overview window to open the storage window. Now click on any icon displayed in the overview window to add the individual file/icon to the list in the storage window. To add series, studies or patients, simply drag-and-drop a patient name from the information part of the overview window (left hand side) and drop it in the storage window list. Do the same to add only a study or series. The patient, study, series or individual file is added to and shown in the storage list.
The image below shows the storage window, opened by clicking the 'Store DICOM files' button. A patient is added by dragging the patient name from the patient list on the left and dropping it inside the storage list, which is the part in the storage window showing the data to be stored. The image below also shows an individual file, added by clicking the icon in the overview window and a study, dragged and dropped from the study list on the left side of the overview window.
You can clear all data from the storage list by clicking the 'Clear ALL' button or by selecting/clicking a patient from the storage list and clicking on 'Remove patient'. The 'Remove' button will show what you are about to remove from the storage list. For example, when clicking on a single image in the storage list, the remove button will show 'Remove image'. The total number of files and the size of all the data is show as well.
Check 'Anonymize data' to store the data anonymously.
When you are ready to save the selected DICOM data files, determine the storage location by clicking the 'Browse' button. Select the destination folder and press 'OK' to confirm it, the folder is now displayed. Click 'Store DICOM files' to copy the data to the selected folder. A sub-folder with a date and time stamp is created and all files are copied and stored inside this folder.
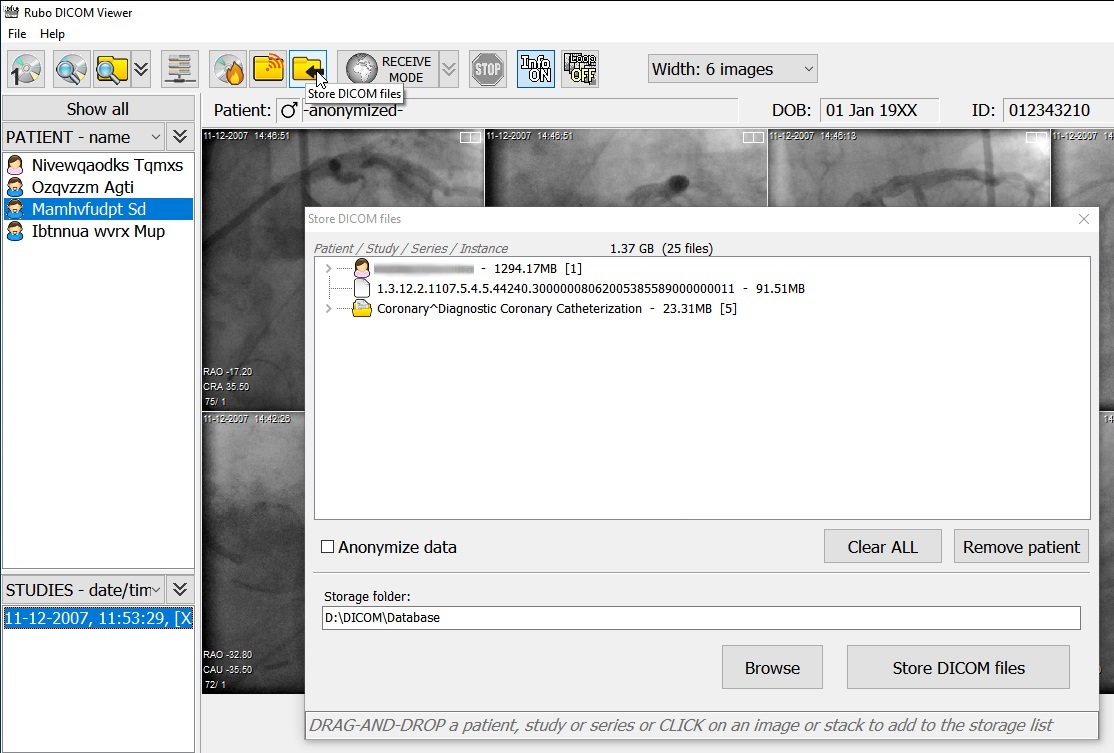
A patient, a single image and a series are selected for storage in folder 'D:\DICOM\Database'