Send DICOM files
Press the 'Send DICOM files' button in the overview window to open the interface. Choose what to send to a DICOM server
by dragging it from the overview window in to the white area of the interface.
Select a DICOM server to send it to and press the 'Send DICOM files' button.
Check 'Anonymize data' to send the data anonymously, check 'Patient ID' to pseudonymize the patient ID for all files.
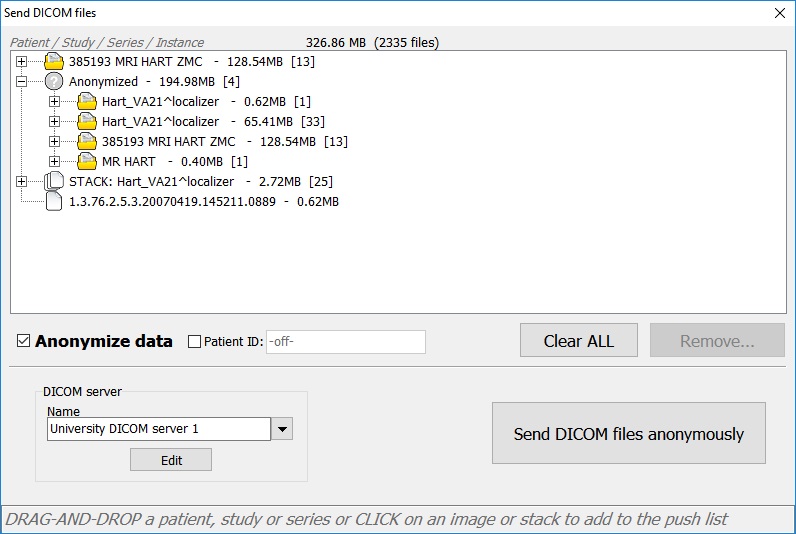
Added a study, a patient with 4 studies, a stack and a single image. A DICOM server is selected to send 326MB data to, anonymized
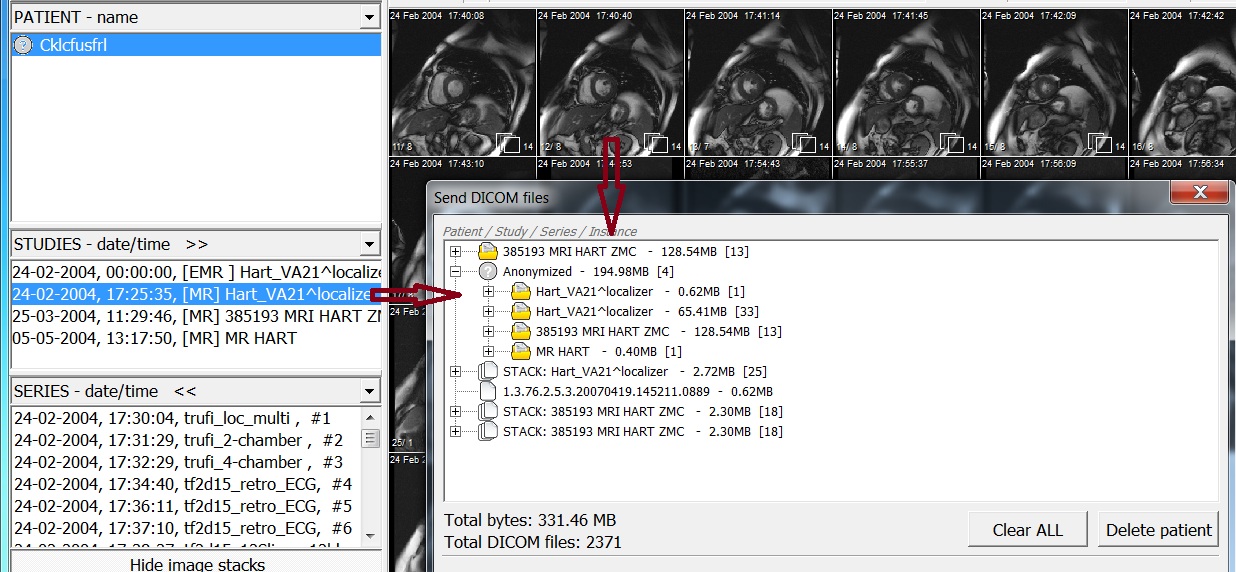
Add a patient, study or series to the send interface by dragging it from the overview window in to the send interface.
Individual images or stacks are selected by clicking on the image, displayed in the overview window. Select multiple patients,
studies and/or series to drag them in one move into the interface.
The dragged items are displayed in the interface as selected: as a patient, study, series, stack or individual image; the icon shows the type of data.
The total files and size of the selected data is displayed.
Delete DICOM files from the interface by clicking on the entry and press the 'Delete' button. The button indicates what
will be deleted, a patient, study, series, stack or an individual image. Press 'Clear ALL' to clear all.
Drag patient, study or series or click on a stack or image to add
When finished adding DICOM files, choose a server from the DICOM server list. See 'Specify
DICOM server data ' how to add and modify DICOM server data.
Press the 'Send DICOM files' button to send start sending data. The interface will close and the Send window will
open. Make sure that all firewalls are open on both the sending- and receiving side of the network.
Mind the security settings of most DICOM servers. PACS will only accept you if they know your IP address and the AE title
of the DICOM viewer.
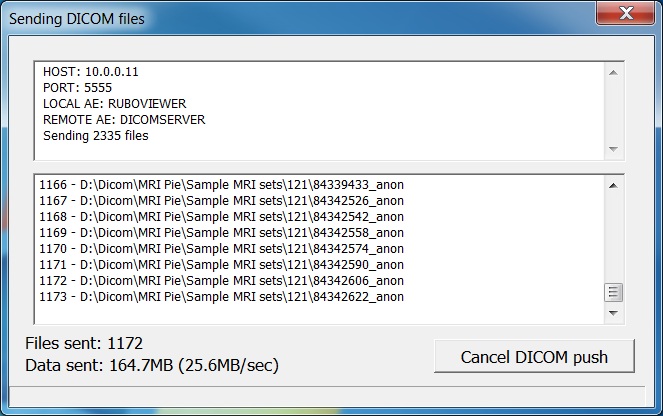
Sending 2335 files to DICOMSERVER at IP address 10.0.0.11 at port 5555