Burn DICOM files to media
Press the 'Burn DICOM files' button in the overview window to open the interface. Choose what to burn by dragging
it from the overview window in to the white area of the interface. Choose a recorder, insert the media and burn
by clicking the 'Burn DICOM CD' button.
Check 'Anonymize data' to burn the CD with anonymous DICOM data, check 'Patient ID' to pseudonymize the patient ID for all files.
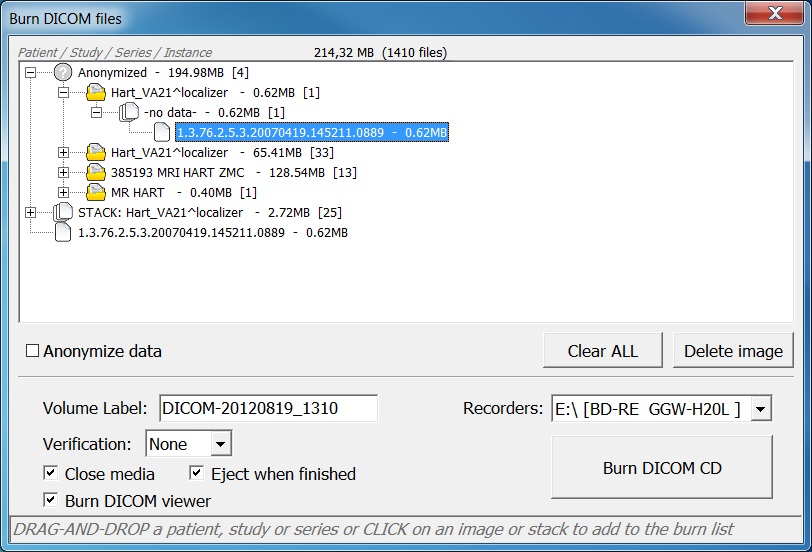
Added a patient with 4 studies, a stack and a single image. A recorder is selected to burn 214MB data, including a copy
of the DICOM viewer
Add data just like the send DICOM interface, see Send DICOM files for an explanation how
to add.
When finished adding the DICOM files, choose the volume label. By default, the label shows the date and time.
Set the verification level and it is advised to check 'Close media'.
By default, a copy of the Rubo DICOM viewer (CD version) is added to the media. The CD viewer will auto-start when
the media is inserted.
The interface does not check what type of media (CD/DVD/BluRay) is inserted. Check that the total bytes to burn
stays within the storage capacity of the inserted media.
Press 'Burn DICOM CD' to burn to media. The interface will close and the 'DICOM CD burner' is started.
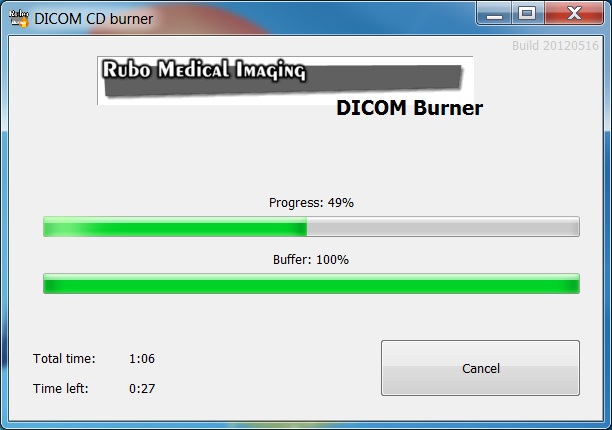
Burning to media
After finishing burning, the CD burner application will close.